Page table of contents
- Facility outline
- Inn
- Shops
- Bank
- Pub
- Crafting facilities
- Reinforce
- Dyeing
- Charge
- Barber
- Orthopedics
- PvP
- Memory temple
- Altar
Facility outline
There are various facilities in the town of FS2 that are useful for adventure. The functions of various facilities are as follows.
- Inn

You can recover your character. - Shops

You can buy and sell items. Shops include item shop, weapon shop, magic shop, protect shop, accessory shop, gather shop, craft shop, and grocer. - Bank

You can deposit and withdraw money and items. - Pub

You can join AI-operated NPCs. - Crafting facilities

You can combine the material items to craft another item. Crafting facilities include blacksmith, bookbind, cooking, sewing, jewel and alchemy. - Reinforce

You can reinforce the equipment crafted by your blacksmith skills. - Dyeing

You can dye accessories crafted with your sewing skills. - Charge

You can charge orbs crafted with jewel skills. - Barber

You can change the character's hairstyle, hair color, and even clothes color. - Orthopedics

You can change the character's sex, skin color, and eyes color. - PvP

You can play PvP (player-versus-player). - Memory Temple

You can lower, seal, and unseal player skills. - Altar

You can skip the boss map by dedicating a specific item.
Inn

At the inn, you can heal your character.
You will need some money to stay, but if you don't have enough, you can use the free stables.
Shops
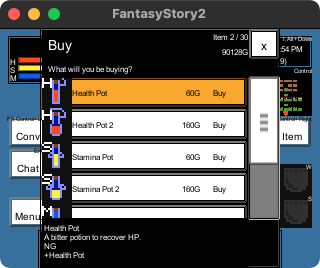
At the shops, you can buy and sell items. Shops include item shop, weapon shop, magic shop, protect shop, accessory shop, gather shop, craft shop, and grocer.
In the buy window, the list will display the item's icon, name, and price. Focusing on an item in the list will display the item details at the bottom. You can purchase an item by selecting it from the list.
In the sell window, select the item you want to sell from the list.
Bank
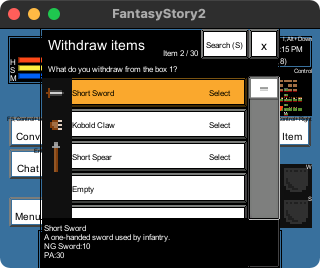
At the bank, you can deposit and withdraw items and money. The bank is shared by all characters, and money and items deposited by one character can be withdrawn by logging in with another character.
When withdrawing an item from the bank, first select the box to withdraw from "From box 1" to "From box 8". After selecting the box, select the item you want to withdraw from the list of items. You can also search for items deposited in the bank by clicking the search button on the upper right or pressing the S key.
When depositing an item in the bank, first select the box to deposit from "To box 1" to "To box 8". After selecting the box, select the item you want to deposit from the list of items.
When withdrawing money, you can withdraw money by entering the amount in the "Amount to withdraw" input field and selecting the "Withdraw" button.
When depositing money, you can deposit money by entering the amount in the "Amount to deposit" input field and selecting the "Deposit" button.
Pub
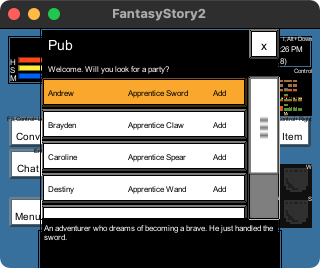
In the pub, you can have AI-controlled NPCs join your party.
Pub are currently located in "Grease Town", "Binarytree Forest", "Wetware Wetland", and "Float City". The NPCs that can join your party vary from place to place.
You can also make your character a friend. The behavior patterns when you make your character a friend are as follows. If you have a wand, you will attack with magic, otherwise you will attack with a weapon. For magic attacks, the direct attack spellbook or orb at the back of the inventory is used. For magic heal, non-resurrection or resurrection spellbooks or orbs at the back of the inventory is used. The potion at the back of the inventory is used when dying. The antidote herb is used when you become poisonous.
The list shows the NPC's name and title, respectively. Focus on the items in the list to show the NPC details at the bottom.
You can add an NPC to your party by selecting "Add". Currently, only one person can join a party.
Friend NPCs will fight automatically when the player starts the battle.
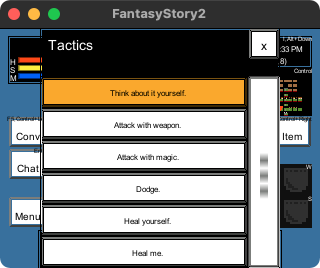
You can open the tactics window by pressing the F6 key or clicking the tactics button in the upper right. In the tactics window, you can command the friend NPCs. NPCs say "Affirmative" if they accept the command and "Negative" if they refuse.
For NPCs that can use heal or resurrection magic, you can have them heal or resurrection by selecting "Heal me". Especially about resuscitation magic, if they are an adventurer who is more than a rookie, it seems that they have resuscitation means such as "Orb of Raise" even if they are not a wizard.
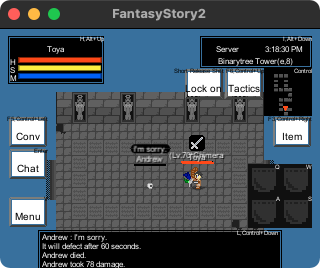
When a friend NPC dies, he will leave after a 60-second resuscitation grace period. If the NPC leaves, you will need to rejoin at the pub.
As for the current specifications, friend NPCs will not consume items even if they use items, and their data will not be saved even if their skill increases.
Crafting facilities
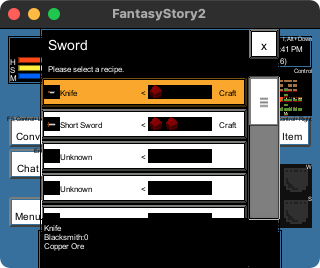
At the crafting facility, you can combine the material items to craft another item. Crafting facilities include blacksmith, bookbind, cooking, sewing, jewel and alchemy.
Please see this page for how to use the crafting facility.
Reinforce
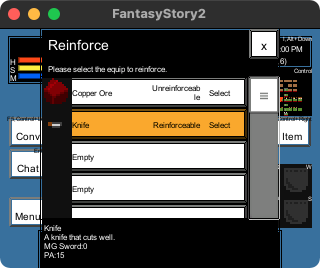
At the reinforce facility, you can reinforce the equipment crafted by your blacksmith skills.
When you have the required item, you can reinforce the item by selecting the equipment item you want to reinforce from the list. Select "Yes" in the confirmation window to complete the reinforcement.
The item required for reinforcement is one of the materials required to craft that item.
Items can be reinforced up to 10 levels, and the reinforcement value is displayed after the item name as "+1" to "+10".
The reinforcement will always succeed regardless of the value of the blacksmith skill, but there is a evaluation to increase the blacksmith skill.
Dyeing
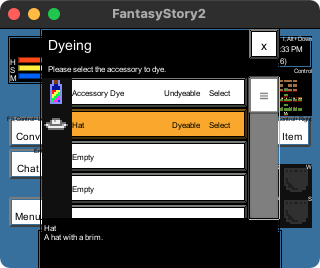
At the dye facility, you can dye accessories crafted with your sewing skills.
When you have "accessory dye", you can dye the item by selecting the accessory item you want to dye from the list.
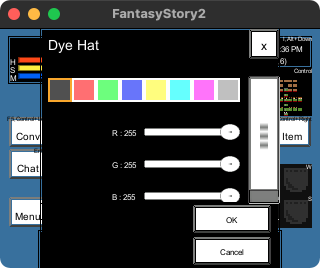
After selecting the item you want to dye, select the color. You can select the color from the "Color Palette" at the top of the window, or specify it with the "R", "G", and "B" sliders below it. After selecting the color, select the "OK" button at the bottom of the window. Select "Yes" in the confirmation window to complete the dyeing.
The item required for dyeing is "accessory dye", which can be purchased at the "craft shop".
Dyeing will always succeed regardless of the value of the sewing skill, but there is a evaluation that the sewing skill will increase.
* The "Set armor transparent" feature has been moved to the equipment window.
Charge
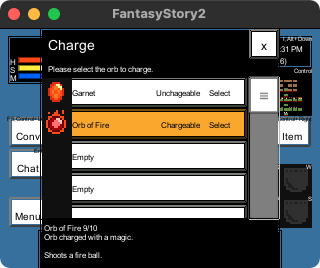
At the charge facility, you can charge orbs crafted with jewel skills.
Orbs that can be crafted with jewel skills are items that you can use various magic with a required skill value of 0 and consumption MP of 0, but the number of times they can be used is limited. The used up orbs will disappear, but you can recover the number of times they can be used by charging them before they are used up.
When you have the garnet, you can charge the item by selecting the orb item you want to charge from the list. Select "Yes" in the confirmation window to complete charge.
The item required for charging is "Garnet", which can be obtained by crafting with the "Jewel" skill from "Garnet Ore" purchased at the "Craft Shop".
The charge will always succeed regardless of the value of the jewel skill, but there is a evaluation to increase the jewel skill.
Barber
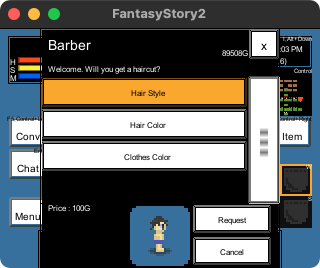
At the barber shop, you can change the character's hairstyle, hair color, and even clothes color.
Select the appearance of the character by "Hairstyle", "Hair color", and "Clothes color". After that, by selecting the "Request" button at the bottom of the window, the change of the character's appearance is completed.
A barber's request costs 100G.
Orthopedics
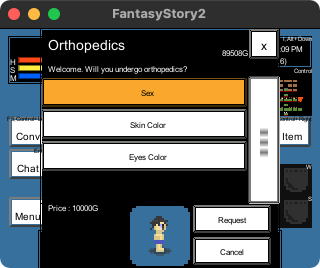
At the orthopedics facility, you can change the character's sex, skin color, and eyes color.
Select the appearance of the character by "sex", "skin color", and "eyes color". After that, by selecting the "Request" button at the bottom of the window, the change of the character's appearance is completed.
A orthopedics request costs 10000G.
PvP
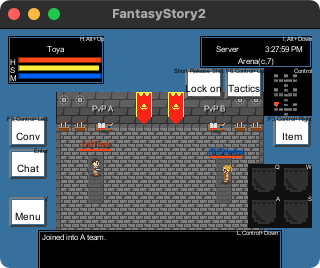
At PvP facilities, you can play PvP (player-versus-player).
PvP facilities are located in each room of the "Arena", which is located above Grease Town. PvP is divided into Team A (red name) and Team B (blue name). Players who want to do PvP shall belong to different teams. When you leave the room, the PvP status will be canceled.
Memory temple
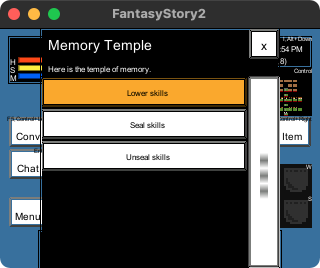
In memory temple, you can lower, seal, and unseal player skills.
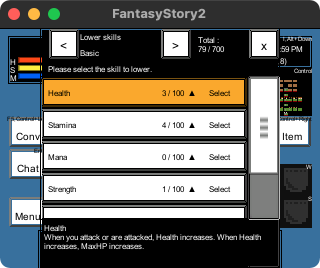
If you select "Lower skills", the "Lower skills" window will be displayed. In the "Lower skills" window, select the skill you want to lower.
When you select a skill to lower, the "Enter a new value" window is displayed. You can lower the skill by entering a new value in the "New value" input field and pressing the "OK" button. You cannot specify a value higher than the current skill value. There are no items needed to lower your skill.
Select "Yes" in the confirmation window to complete "Lower skills".

Select "Seal skills" to display the "Seal skills" window. In the "Seal skills" window, select the skill you want to seal. Required items are Memory Sand with a skill value of 30 or less, Hi Memory Sand with a skill value of 60 or less, and Ex Memory Sand with a skill value of 100 or less. Sealing the skill consumes Memory Sand and gives you Memory Hourglass.
Select "Yes" in the confirmation window to complete "Seal skills".
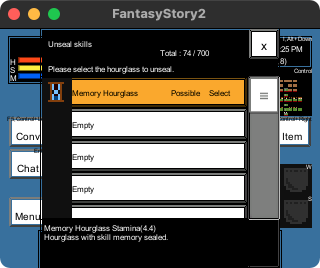
Select "Unseal skills" to display the "Unseal skills" window. In the "Unseal skills" window, select the memory hourglass that you unseal the skill. When unsealing a skill, pay attention to the rest of the skill value. If the sealed skill value is greater than the rest of the skill value, it will be truncated.
Select "Yes" in the confirmation window to complete "Unseal skills".
Altar
Altars exist in front of the boss map where the player is confined, and by dedicating specific items, the boss map can be skipped.
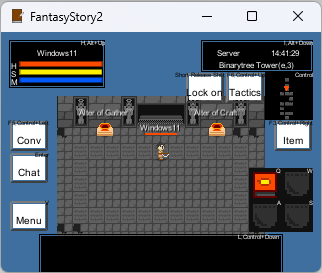
At the Altar of Gather, you can dedicate the items you have collected with your Gathering Skill, and at the Altar of Craft, you can dedicate the items you have produced with your Craft Skill.
If you dedicate an item, you will move to a map that jumps over the boss map. Please check the terrain of the area in the map window so as not to return to the boss map after moving.